To prepare your Facebook ad account you will need to verify your website domain(s). This is required so Facebook can recognize you as the owner of your website and help avoid disruption to your advertising campaigns. Verifying your domain will allow you to select, configure and prioritize the conversion events you want to use for your Facebook Ad campaigns.
Going forward, you will only be able to use 8 conversion events for your Facebook Ad campaigns. These pixels allow you to optimize your campaigns for actions on your website such as form submissions, purchases, and link clicks- so it’s important that we have these properly defined. In order for us to define these conversion events we are required to verify the website domain(s).
Steps to Verify Your Website Domain and Review Pixels
1. Verifying Your Website Domain
To address this, log into your Facebook Business Manager account and visit the Ads Manager resource center. On this page you may see the notification titled, Verify your website domain.
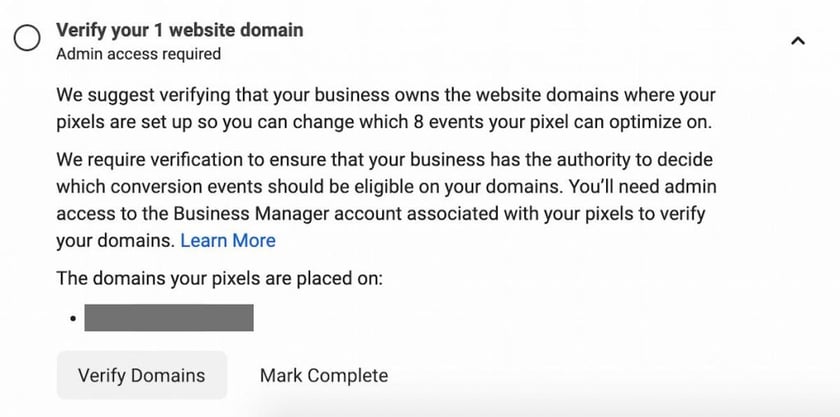
Once you open the notification select the Verify Domains button at the bottom of this notification. This will take you to Domains within the Brand Safety tab of the Settings page. From here you’ll want to select the domain(s) that you’d like to verify.
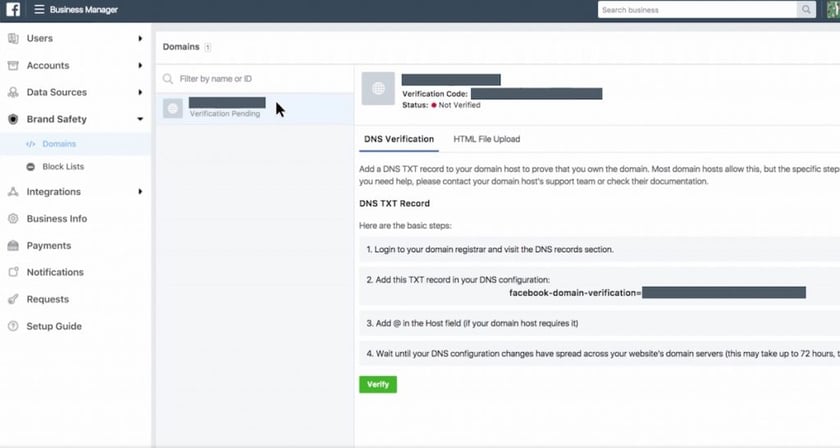
There are two different ways you are able to verify your domain for Facebook. You can either verify through DNS TXT Record or through HTML File Upload. If you have login credentials to your domain’s registrar you’ll want to verify through DNS TXT Record. If you have admin access to your website’s root folder you’ll want to verify through HTML File Upload. Steps are outlined below for both paths:
Please note: The steps below outline what setup may look like using cPanel as a web host. Setup may vary depending on web host.
Verify through DNS TXT Record
To verify your domain through DNS TXT Record you’ll want to log into your domain registrar and navigate to the DNS Record settings page. From there you’ll want to select Add a Record and select TXT as the type of record. If required, put the ‘@’ symbol under HOSTNAME field.
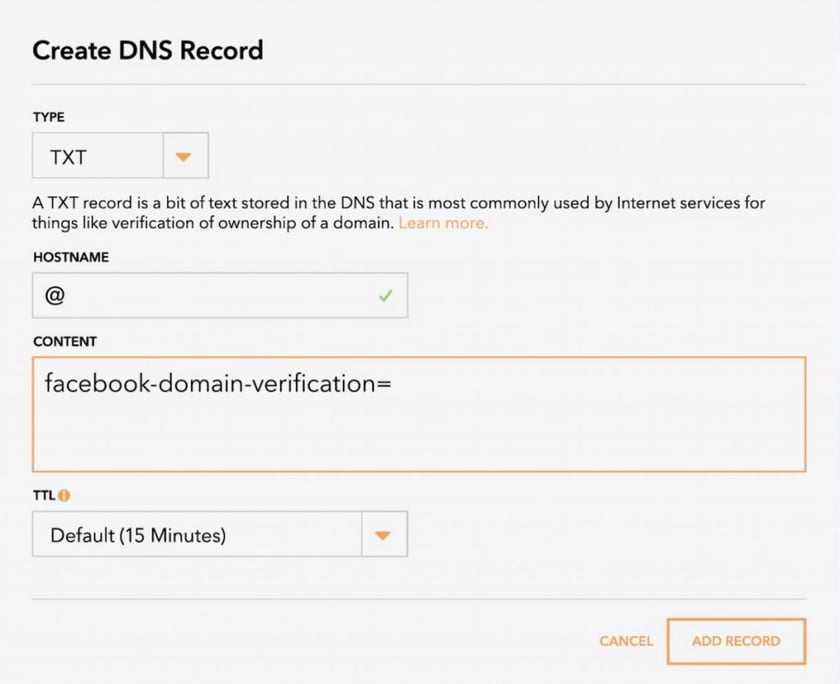
Next you’ll want to copy the TXT record from the DNS Verification page on Facebook Business Manager.
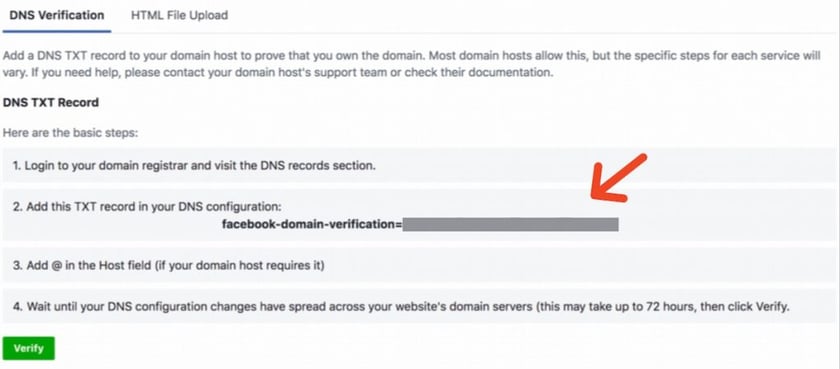
Paste this TXT record in the content field of the record you are creating and add the record.
Once accepted, all you’ll need to do is return to the Brand Safety tab under Facebook Business Manager settings, locate the domain and click Verify under DNS Verification.
Now that the domain is verified you can return to the Verify your website domain section in the resource center and mark that task as complete!
Congratulations! You’ve successfully verified your domain(s)! Please move down to the Review Pixels section to move on to the next step.
Verify through HTML File Upload
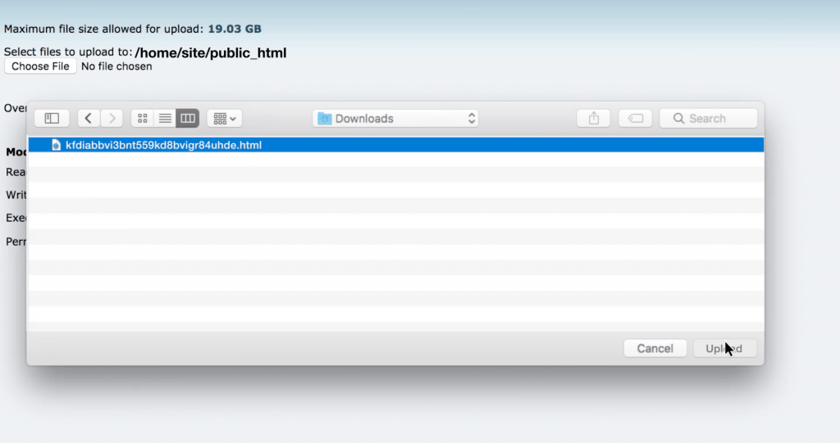
The second way you are able to verify your domain is through an HTML File Upload. If you’d prefer to go this route you’ll want to download the HTML verification file provided under the HTML File Upload tab.
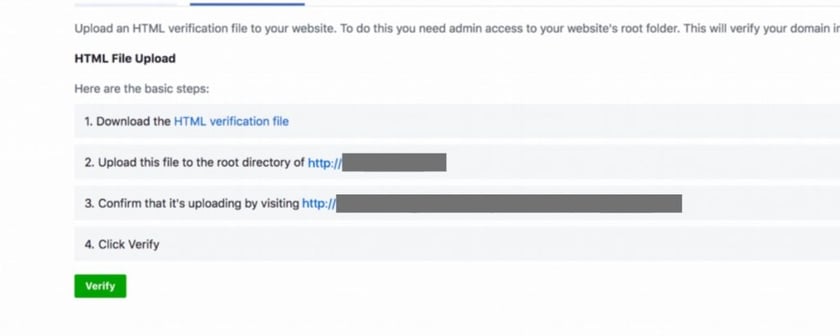
If using cPanel as a web host it might look similar to this, but setup may vary. After logging into your website, you’ll want to navigate to the root directory of your website (public_html folder).
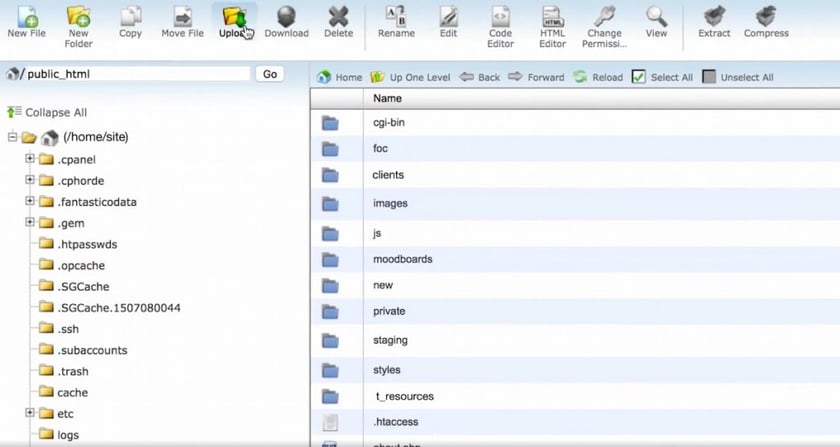
From there you’ll want to select the upload button and upload the provided file making sure you’re uploading to the root directory of your website.
Once accepted, all you’ll need to do is return to the Brand Safety tab under Facebook Business Manager settings, locate the domain and click Verify under DNS Verification.
Now that the domain is verified you can return to the Verify your website domain section in the resource center and mark that task as complete!
Congratulations! You’ve successfully verified your domain(s)!
2. Review Pixels through Facebook’s Aggregate Event Measurement page
Now that your domain is verified we can move on to reviewing your existing Facebook pixels and adjust which conversion events you’d like to use. You’ll be able to access this by navigating to the Events Manager page. You can also get here by clicking the Review Pixels button in the Review pixels that will no longer have conversion events task on resource center.

On the events manager page you’ll see your active pixel(s) on the left-hand side of the page. Select the pixel you want to define conversion events for.
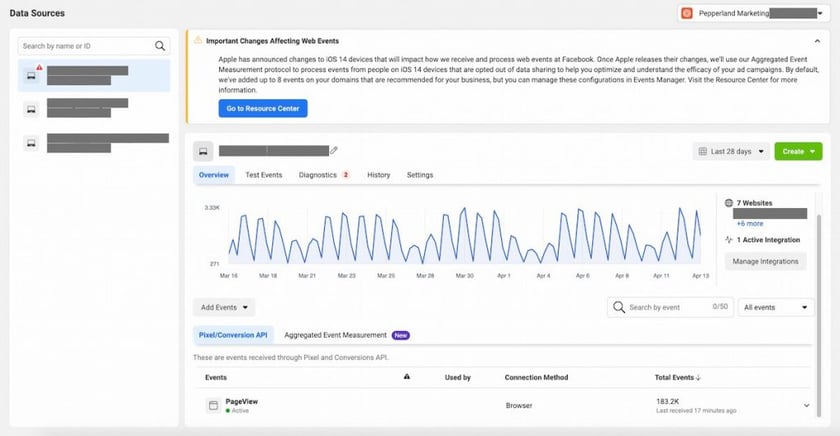
From here you will see a list of all events that are currently being received by the Pixel/Conversion API.
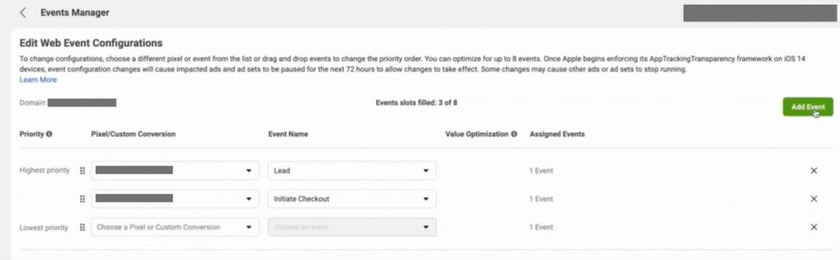
Select the Aggregated Event Measurement tab on the center of the page and then click the Configure Web Events button.
On the Web Event Configuration page you will see all of your domains and any assigned conversion events. After completing the previous steps there should be a Domain Verified status next to your domain(s).
By default, the domains will be configured with up to 8 prioritized conversion events. To make sure the correct conversion events are assigned, select the domain and press Edit Events.
From this page you will be able to view and configure up to 8 web events for that domain. You are also given the option to set the priority for each of the events. Make sure to do this for each of the domains associated with your Facebook account.
You have now taken steps to ensure that your account is set up so that your campaigns can optimize for conversion events that take place on your business website!
What other actions can I take to prepare my account?
In addition to the updates we’ve covered above, there are also updates to the delivery statuses, reporting, targeting, audience sizes, and an updated software development kit for business apps. To learn more about this update you can view a full list of how Apple’s iOS14.5 impacts your Facebook Ad account here.
There are a lot of factors that go into creating and managing an effective social media marketing and advertising strategy. From correctly setting up and maintaining your marketing platforms, to developing campaigns that achieve your business goals. At Pepperland Marketing, we specialize in inbound and content marketing and can help your business grow exponentially through our expertise and resources. Contact us today to find out how we can help achieve your goals.